This article provides a detailed guide, walking you through step by step on how to switch the initialization method of your WSL subsystem from init to systemd. After completing the switch, you will be able to use the systemctl command to manage services.
Setting up systemd Startup
First, check your WSL version using the command wsl --version in the Windows terminal. If the WSL version is lower than 2.x, you need to update it by running wsl --update.
Next, confirm the version of your subsystem by using the command wsl -l -v to check the version status:
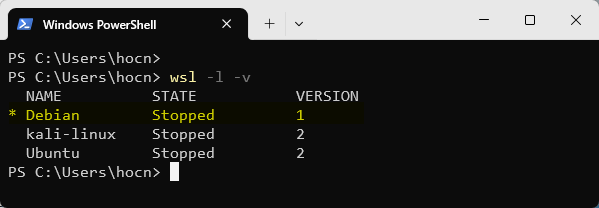
If your subsystem version is 1, you need to change it to version 2 by executing the following commands:
# Set the default WSL version to 2
wsl --set-default-version 2
# Convert the subsystem to WSL 2, using Debian as an example
wsl --set-version Debian 2
This process may take some time; please be patient.
After the conversion is complete, start your subsystem, edit the /etc/wsl.conf file, add the following content to the file, and save it:
[boot]
systemd=true
Exit your subsystem, and execute the command wsl --shutdown in the Windows terminal to shut down WSL.
Restart the subsystem, and enter the command ps -p 1 to check if it successfully started with systemd:
ps -p 1
  PID TTY          TIME CMD
    1 ?        00:00:00 systemd
Seeing systemd indicates success. You can now use the systemctl command to manage services.