Qt Designer is a visual UI design tool provided by the Qt framework, enabling developers to quickly build graphical user interfaces through drag-and-drop components without manually writing extensive layout code. The interface files (.ui) it generates can be directly loaded by PySide6 (or PyQt), significantly improving Python GUI development efficiency.
In this article, you'll learn to design UIs with QtDesigner and implement them in Python.
Designing UI with Qt Designer
Launching Qt Designer
Qt Designer doesn't require separate installation. After installing PySide6, you can find pyside6-designer.exe in .\Python311\Scripts, where Python311 is your Python installation directory.
Alternatively, launch Qt Designer directly by running pyside6-designer in your terminal.
Designing the Form
After launching Qt Designer, create a Widget-type form.
Add the following controls by dragging them onto the form:
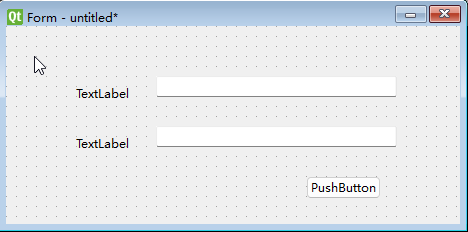
- 2 Labels
- 2 Line Edits
- 1 Push Button
Open the Property Inspector from the View menu or using Ctrl + I shortcut.
Select each control to adjust size and position, then modify these properties:
| Control | Property | Value |
|---|---|---|
| Label1 | text | Username: |
| Label2 | text | Password: |
| Line Edit 1 | objectName | txtUser |
| maxLength | 16 | |
| Line Edit 2 | objectName | txtPassword |
| maxLength | 16 | |
| echoMode | Password | |
| Push Button | objectName | btnLogin |
| text | Login | |
| Form | objectName | frmLogin |
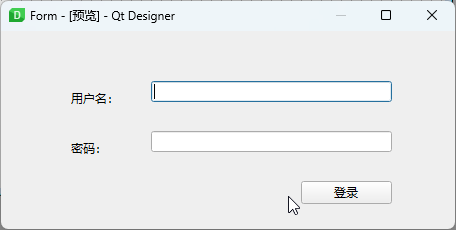
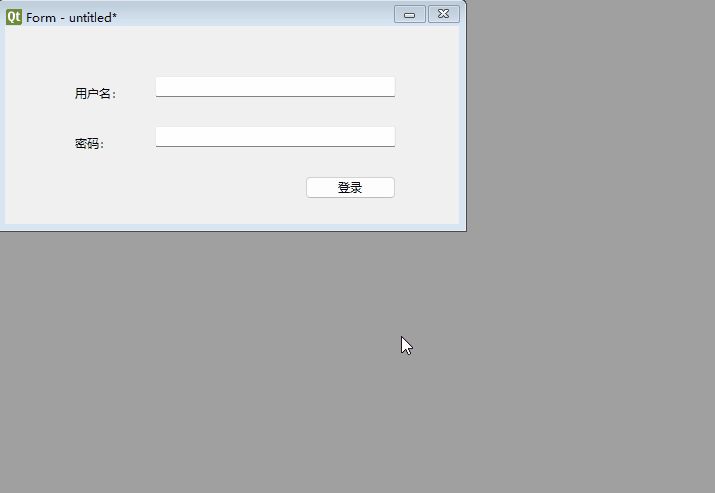
Previewing the Design
Preview using Ctrl + R or through the Form > Preview menu to select styling.
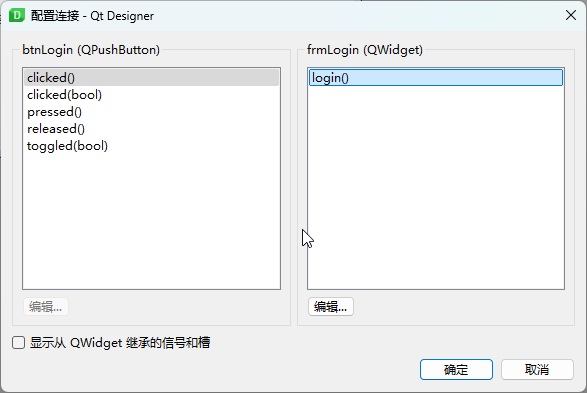
Adding Signals and Slots
Switch to Signal/Slot Editing mode using the toolbar (yellow highlighted button) or F4. Return to Widget Editing mode with the light green button.

Drag from the login button to an empty area on the form (not onto other controls) to open the signal-slot connection dialog:
Select clicked(), click Edit (right panel), add a slot named login(), then confirm.
Saving the File
Save the designed UI as login.ui
Implementing the UI in Python
Two methods to load Qt Designer UIs in Python:
- Convert
.uito Python code (recommended) - Dynamically load
.uifiles
Converting UI Files to Python Code
Convert the .ui file to .py using:
pyside6-uic.exe is located in the same directory as Qt Designer.
Regenerate Python code after UI modifications.
pyside6-uic.exe login.ui -o ui_login.py
This generates ui_login.py containing a Ui_frmLogin class with setupUi method for control initialization.
Implementation example:
import sys
from PySide6 import QtCore, QtWidgets, QtGui
import ui_login  # Import generated UI

class LoginWidget(QtWidgets.QWidget):
    def __init__(self):
        super().__init__()

        self.ui = ui_login.Ui_frmLogin()  # Instantiate UI
        self.ui.setupUi(self)  # Initialize

    @QtCore.Slot()  # Slot decorator
    def login(self):  # Slot named in Qt Designer
        print(self.ui.txtUser.text(), self.ui.txtPassword.text())

if __name__ == "__main__":
    app = QtWidgets.QApplication([])
    widget = LoginWidget()
    widget.show()
    sys.exit(app.exec())
Dynamic UI Loading
Avoid signal-slot setup in Qt Designer when using this method - it won't work!
Implementation example:
import sys
from PySide6.QtWidgets import QApplication, QWidget
from PySide6.QtUiTools import QUiLoader
from PySide6.QtCore import QFile

class LoginWidget(QWidget):
    def __init__(self):
        super().__init__()

        loader = QUiLoader()  # Create loader
        ui_file = QFile("login.ui")  # Specify UI file
        ui_file.open(QFile.ReadOnly)  # Open read-only
        self.ui = loader.load(ui_file, self)  # Load UI
        ui_file.close()  # Close file

        # Dynamic loading requires handling signals and slots on your own
        # Manually connect button click
        self.ui.btnLogin.clicked.connect(self.login)

    def login(self):
        print(self.ui.txtUser.text(), self.ui.txtPassword.text())

if __name__ == "__main__":
    app = QApplication([])
    widget = LoginWidget()
    widget.show()
    sys.exit(app.exec())